Navigating the Roof Insurance Claims Process
Insurance claims roofing is a process that many Northeast Ohio homeowners find overwhelming after storm damage. Here’s a quick overview of the essential steps:
- Document damage with photos and videos immediately after the storm
- Contact a reputable roofing contractor for a professional inspection
- File your claim with your insurance company (typically within one year)
- Schedule an adjuster inspection and have your roofer present
- Review the settlement offer carefully before accepting
- Complete repairs with your chosen contractor
- Submit final paperwork to receive any remaining depreciation payments
When severe weather strikes Northeast Ohio, your roof takes the brunt of the impact. Understanding how to steer the insurance claims roofing process can mean the difference between a smooth restoration and weeks of stress and financial uncertainty.
With the average wind and hail claim totaling around $13,000, knowing how to properly file and manage your roof insurance claim is essential for protecting your home and finances.

7 Easy Changes that Simplify Insurance Claims Roofing
The difference between a successful roof insurance claim and a frustrating experience often comes down to a few key changes in your approach. By implementing these seven adjustments, you can significantly improve your chances of a fair settlement.

Change #1: Know What Your Policy Covers Before the Storm Hits
Most standard homeowners policies cover damage from wind, hail, fire, and falling objects, but may exclude flooding or earthquakes. Check your deductible amount and whether you have Actual Cash Value (ACV) or Replacement Cost Value (RCV) coverage. Also look for code upgrade provisions, which determine if your insurer will pay for bringing your roof up to current building codes.
“Your roof is your home’s first line of defense against severe weather,” notes Walker Roofing & Construction LLC. “Understanding what your policy covers before you need to file a claim puts you in a much stronger position.”
Change #2: Call a Roofer First for Insurance Claims Roofing Accuracy
Having a professional roofing contractor inspect your roof before filing a claim helps determine if the damage warrants a claim and ensures thorough documentation of all damage. Professional roofers understand what insurance adjusters look for and how to document it properly.
“If the damage is minor and below your deductible, filing a claim may not be in your best interest,” explains Walker Roofing. “But if significant damage exists, having professional documentation strengthens your position tremendously.”
Change #3: Document Everything—Photos, Videos, Receipts
Take time-stamped photos of all visible damage from multiple angles. Videos showing the extent of the damage can be even more compelling. Keep receipts for any emergency repairs and download weather reports confirming storms in your area on specific dates.
“We recommend using a tape measure in photos to show the size of hail impacts or damaged areas,” suggests Walker Roofing. “This provides scale and helps adjusters understand the severity.”
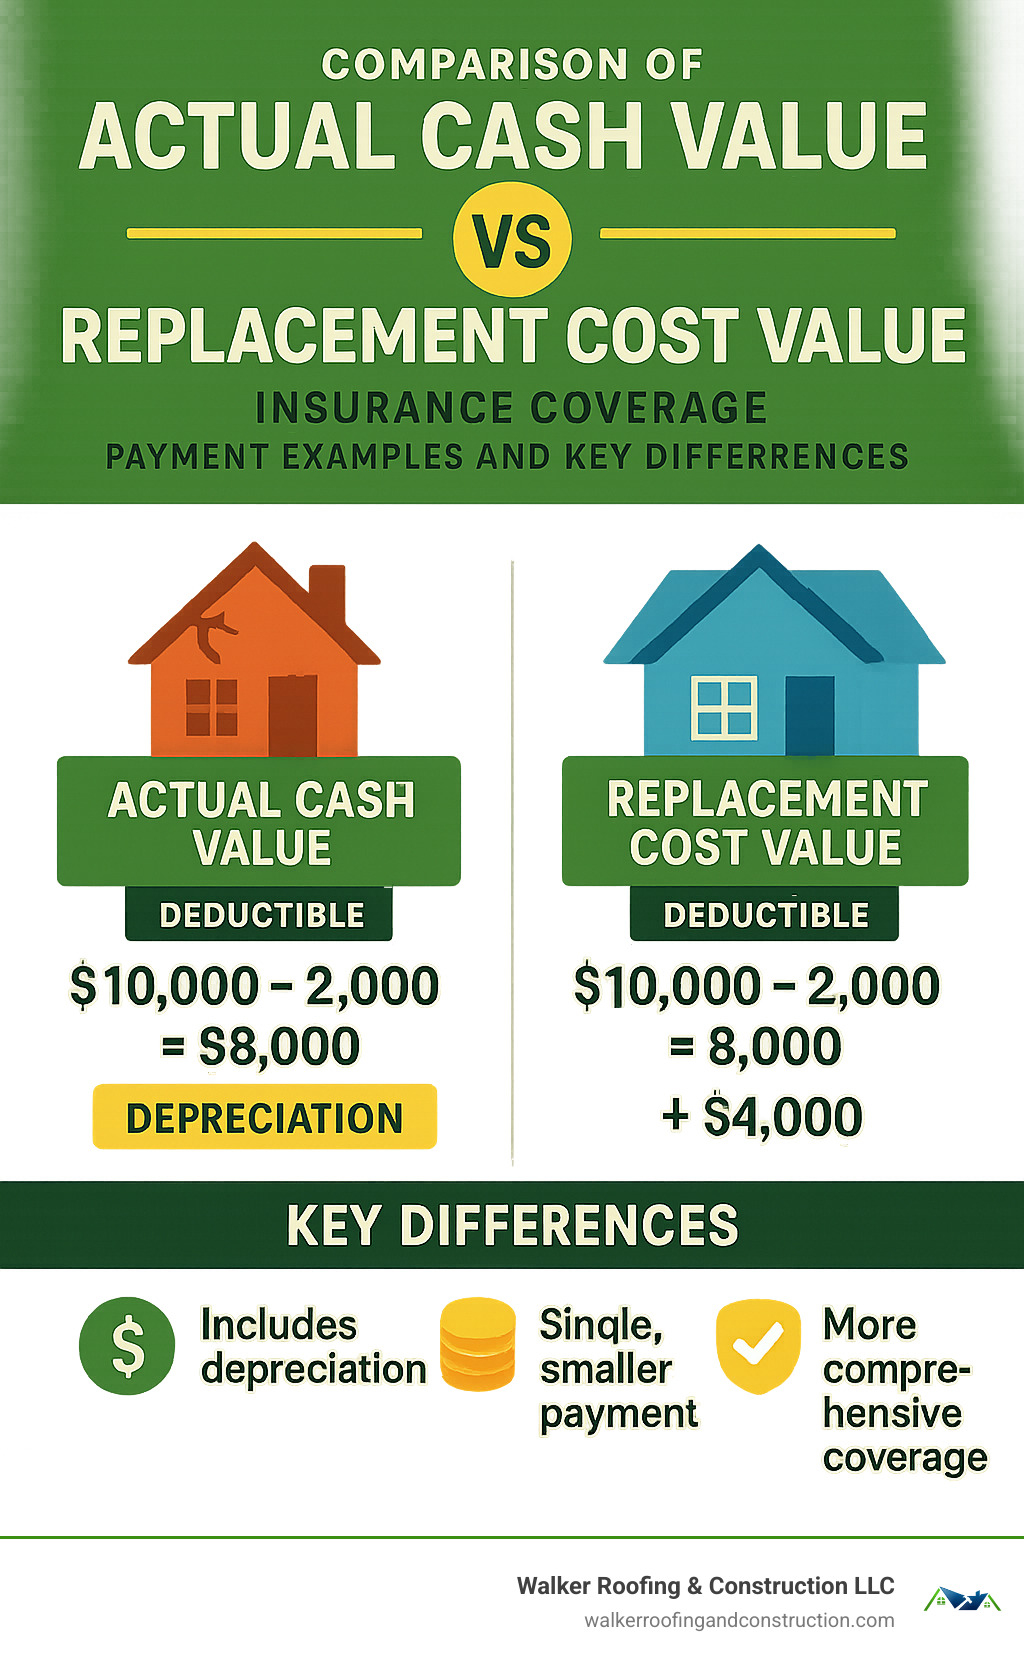
Change #4: Understand ACV vs RCV Payouts to Maximize Settlement
With Actual Cash Value (ACV) coverage, your insurer pays the depreciated value of your roof at the time of the claim. Replacement Cost Value (RCV) coverage is more comprehensive, covering the full cost to replace your roof at current prices. RCV typically pays out in two installments: an initial payment (ACV amount minus deductible) followed by recoverable depreciation after repairs are completed.
“Many homeowners don’t realize their older roof may have been switched to ACV coverage during policy renewal,” warns Walker Roofing. “This can lead to unexpected out-of-pocket costs when filing a claim.”
Change #5: Never Waive Your Deductible—It’s Illegal and Risky
Contractors who offer to “waive” or “absorb” your deductible are engaging in a practice that’s illegal in many states, including Ohio. Your insurance company may request proof that you paid your deductible, and if you can’t provide it, you could face serious consequences.
Change #6: Be Present at the Adjuster Inspection with Your Roofer
Having both yourself and your roofing contractor present during the adjuster’s inspection can dramatically impact your claim outcome. Your contractor can point out all damage that might otherwise be missed and identify code-required upgrades that should be included in your claim.
“The adjuster’s inspection typically lasts 30-60 minutes, but decisions made during this brief window determine your entire claim settlement,” notes Walker Roofing.
Change #7: Use Supplements & Follow-Up to Capture All Insurance Claims Roofing Dollars
Initial insurance estimates frequently overlook permit fees, code-required upgrades, ice and water shield requirements, proper ventilation components, and other necessary items. The supplemental process involves identifying missing items in the initial estimate and submitting a formal request to the insurance company.
“Most insurance estimates have to be supplemented,” explains Walker Roofing. “It’s not that adjusters are deliberately omitting items—they simply can’t catch everything in a single inspection.”
Step-By-Step Roof Insurance Claim Process & Documentation

Step 1: Immediate Actions After Finding Damage
Prioritize safety first. If you notice leaks or structural concerns, keep your family away from those areas. Document everything with clear, time-stamped photos and videos of all visible damage, both outside and inside your home.
For obvious leaks, temporary repairs are essential. A quality tarp secured properly can prevent thousands in additional water damage. Keep every receipt from these emergency measures—they’re typically reimbursable.
“I always tell homeowners to stay off their damaged roofs,” says Walker Roofing. “Not only could you hurt yourself, but insurers might deny coverage for damage caused by walking on an already compromised roof.”
Once immediate concerns are addressed, call a reputable roofing contractor for a professional assessment.
Step 2: Professional Inspection & Estimate Collection
A thorough professional roof inspection provides the credible documentation that transforms a questionable claim into an approved one. Trained inspectors examine everything from shingle condition to flashing integrity, ventilation components to underlying decking.
Most professional roofing companies now employ aerial measurement services or drone photography to provide accurate dimensions and overhead views. Your inspector should also identify any code-required upgrades that would be necessary during repairs.
The result is a detailed, itemized estimate that serves as the backbone of your insurance claim.
Step 3: Filing Your Insurance Claims Roofing Packet
Contact your insurance company through their claims department. When you initiate the claim, you’ll receive a claim number—write this down immediately. Provide a clear, specific description of when the damage occurred.
Submit your complete package including:
* All photos and videos of the damage
* Your professional inspection report
* The contractor’s itemized estimate
* Weather reports confirming the storm in your area
* Receipts for any emergency repairs
Keep a detailed log of every conversation with your insurance company. Most insurance companies will acknowledge your claim within 1-2 days and assign an adjuster within a week.
Step 4: Adjuster Meeting, Negotiation & Supplemental Claims
When scheduling the inspection, insist on a time when both you and your roofing contractor can be present. During the inspection, walk the property together and allow your contractor to point out all damage to the adjuster.
After the inspection, the adjuster will prepare their estimate and submit it to the insurance company. You’ll typically receive their determination within 7-10 days.
When you receive the adjuster’s estimate, compare it line-by-line with your contractor’s estimate. If you find missing items, prepare a supplemental claim with supporting documentation for each discrepancy.
Step 5: Approval, Deductible Payment & Final Settlement
If you have Replacement Cost Value (RCV) coverage, you’ll first receive the Actual Cash Value (ACV) payment, representing the depreciated value of your damaged roof minus your deductible.
With approval in hand, schedule your roof replacement. When work begins, pay your deductible directly to your contractor. After completion, you’ll receive final paperwork from your contractor. Submit these documents to your insurance company promptly to receive your recoverable depreciation—the second portion of your RCV payment.
The entire timeline from approval to final payment typically spans 30-60 days. By working with experienced professionals like Walker Roofing & Construction LLC, you can steer the insurance claims roofing process with confidence.
Conclusion
Navigating the insurance claims roofing process doesn’t have to be overwhelming. By understanding your policy before storms strike, partnering with qualified roofing professionals, documenting everything with care, staying engaged throughout the process, and following through on supplements and final paperwork, you can transform a potentially stressful experience into a successful one.
For over two decades, Walker Roofing & Construction LLC has been a trusted guide for Northeast Ohio homeowners facing the aftermath of severe weather. Their dual expertise in quality roofing and insurance claims navigation provides the support you need during challenging times.
“We see ourselves as advocates for homeowners,” the Walker Roofing team often tells clients. “Our mission goes beyond simply fixing roofs—we’re here to ensure your home is properly restored after storm damage, and that your insurance company fulfills their promises to you.”
When storm damage strikes your Northeast Ohio home, Walker Roofing & Construction LLC stands ready with their experienced team, CertainTeed Master Shingle Installer certification, and reassuring 10-year workmanship guarantee.